What Is the Best Way to Fix Damaged Plush Toys?

Time:2026-10-08 Author:Amelia
0%

A beloved plush toy rarely breaks in one dramatic moment. More often, a loose seam, flattened stuffing, or stained fur appears after years of hugs. Learning how to fix damaged plush toys begins with identifying the damage, not reaching for a needle immediately. A careful repair protects the toy’s shape, fabric, and sentimental value. It also prevents a small tear from becoming a larger split. In my experience, patience matters more than perfect sewing. Some repairs look uneven at first. That is acceptable.

This guide introduces practical methods used by careful crafters and textile repair professionals. It explains how to clean plush fabric safely, close openings with strong hand stitches, replace missing stuffing, and secure detached eyes or noses. Each method considers the toy’s age, fiber type, filling, and construction. A vintage plush may need gentler handling than a modern washable toy. Before using water, glue, heat, or commercial cleaners, test an unseen area. Manufacturer care labels and conservation guidance should take priority when available. Never assume one method suits every toy.

The best repair is usually the least aggressive one. Small stitches, matching thread, and gradual stuffing can preserve a familiar face without making it stiff. However, some damage may require a professional textile conservator, especially when fabric is fragile, moldy, electronically integrated, or historically valuable. This article will help readers choose realistic repairs and recognize their limits. The result may not look factory-new. It can still feel safe, clean, and loved again. Repair takes judgment. Sometimes, restraint is the most skilled choice.
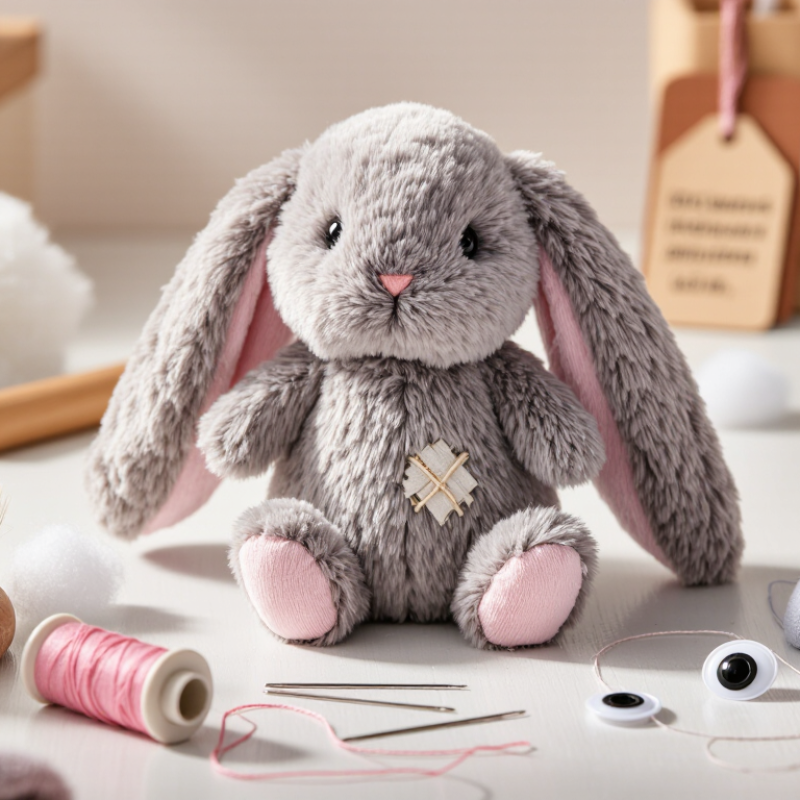
What Is the Best Way to Fix Damaged Plush Toys?

Assess the Plush Toy’s Damage and Identify Its Materials

What Is the Best Way to Fix Damaged Plush Toys?

Assess the Plush Toy’s Damage and Identify Its Materials

Before sewing, inspect the plush toy under bright, natural light. Check torn seams, loose stuffing, stains, melted fibers, and damaged eyes. A small tear often needs only ladder stitching. A crushed body may require opening the lining and redistributing the filling. According to the U.S. Consumer Product Safety Commission’s 2023 toy injury report, toys were linked to about 231,000 emergency department-treated injuries among children under 15. Loose parts deserve serious attention.

Identify the outer fabric first. Cotton feels cool and slightly uneven, while polyester usually feels smooth and springy. Velvet, faux fur, and knitted fabrics need different needle sizes and thread tension. Examine the filling through the opening. Polyester fiberfill, foam, and natural fibers should not be mixed casually. The U.S. Environmental Protection Agency’s latest detailed textiles data reported 17 million tons of textile waste in 2018, with only 2.5 million tons recycled. Careful repair can delay disposal, but unsuitable materials can create new problems.

I once pulled a seam too tightly. The toy’s face became crooked. That mistake taught me to match the original tension. Remove stuffing with clean tweezers, not forceful pulling.

For toys used by young children, replace loose eyes with secure stitching or embroidered details. ASTM F963, the U.S. toy safety standard, emphasizes secure components and accessible materials.

If the fabric smells chemical, feels sticky, or shows heat damage, pause before repairing. I would rather leave one flaw than hide a material problem.

Gather the Right Tools and Prepare a Clean Repair Area

What Is the Best Way to Fix Damaged Plush Toys?

A clean repair area makes plush toy repairs safer and more precise. Cover a sturdy table with a freshly washed cotton cloth. Good lighting helps you find loose threads, tiny tears, and flattened fabric. Wash your hands before handling the toy. Oils and dust can leave marks on pale fur.

Gather small scissors, a blunt needle, matching thread, fabric clips, tweezers, and a soft brush. Keep a seam ripper nearby for opening damaged seams carefully. Avoid cutting fur whenever possible. Trim only loose fibers. For toys with loose stuffing, prepare clean polyester filling and add it in small amounts. Too much filling can distort the original shape. I sometimes overfill a repair when working quickly, so checking the toy’s firmness matters.

Tips: Photograph the damage before starting. Test thread color on a hidden seam. Use clips instead of pins when children may handle the toy. Place sharp tools in a small container, not directly on the table. A lint roller can remove surface dust, but press gently on fragile fabric. If the material feels brittle, pause before sewing. A rushed repair may create a larger tear.

What Is the Best Way to Fix Damaged Plush Toys?

Gather the right tools and prepare a clean repair area before starting.

A basic plush-toy repair setup usually requires one clean work surface, sharp scissors, a sewing needle, matching thread, replacement stuffing, and clips to hold fabric in place. Preparing these items first helps reduce interruptions and keeps small parts organized.

Repair Tears, Loose Seams, and Detached Limbs Step by Step

What Is the Best Way to Fix Damaged Plush Toys?

Repairing a plush toy starts with a clean, dry surface and a careful inspection. Check whether the tear affects only the fabric or also the stuffing. Remove loose threads with small scissors, but do not cut the surrounding stitches. For a narrow tear, use a sharp needle and matching thread. A ladder stitch can close the opening neatly from the outside. Keep each stitch small and even. Do not pull too tightly, or the fabric may pucker.

Loose seams need stronger support. Turn the toy inside out when possible, then sew along the original seam line. For thin fabric, add a small backing patch behind the damaged area. Soft polyester fabric can stretch unexpectedly. Test one stitch first. I learned that rushing this step often creates a second tear. Detached limbs require extra care because they receive repeated pressure during handling. Align the limb with its original position, pin it securely, and sew around the base several times. Use firm stitches, but avoid crushing the stuffing.

Work slowly. Small repairs are easier to control. If stuffing has escaped, replace it with clean, suitable filling rather than household scraps. After sewing, gently flex the joint and inspect for gaps. A repair may look imperfect, especially on older toys. That is acceptable if the seam is secure, the fabric is comfortable, and no sharp thread ends remain.

Restore the Toy’s Filling, Shape, Fur, and Facial Features

What Is the Best Way to Fix Damaged Plush Toys?

Restoring a plush toy starts with its filling and shape. Open a hidden seam carefully, then remove damaged or lumpy stuffing. Replace it with clean, washable polyester fiberfill in small handfuls. Pack the limbs lightly, but support the head and neck firmly. Overstuffing creates hard seams and an unnatural expression. Small stitches matter.

Use a ladder stitch with strong, matching thread to close the opening. My first repairs were too tight, which made the fabric pucker. A softer tension usually looks more natural. Spot-clean fur with mild detergent and a barely damp cloth. Brush in the original direction after drying. Avoid soaking old toys, because moisture can hide inside the filling and cause odor or mold.

Facial features need extra care. Re-embroider loose eyes, noses, and mouths instead of relying on surface glue. Check every attachment by gently pulling it, especially when children use the toy. Current toy-safety guidance from the U.S. Consumer Product Safety Commission emphasizes secure parts and age-appropriate construction. Repair also supports waste reduction. The U.S. EPA reported that 11.3 million tons of textiles reached landfills in 2018. WRAP’s Valuing Our Clothes report found that extending textile life by nine months can reduce carbon, water, and waste footprints by 20–30%. These figures do not measure plush toys directly, so the comparison has limits. Still, careful restoration keeps usable materials in service longer. Do not rush.

What Is the Best Way to Fix Damaged Plush Toys? - Restore the Toy’s Filling, Shape, Fur, and Facial Features
Repair Area Common Damage Recommended Materials Repair Method Typical Time Skill Level Important Safety or Care Note
Initial Inspection Loose seams, stains, flattened filling, damaged fur, or missing facial details Bright light, clean towel, tweezers, small scissors, sewing kit Check the entire toy before cleaning or sewing. Identify loose threads, openings, hard objects, and areas with missing stuffing. 10–20 minutes Low Remove batteries, sound modules, clothing, and detachable accessories whenever possible.
Surface Cleaning Dust, light dirt, food residue, or mild discoloration Soft brush, mild detergent, lukewarm water, white cloth Test a hidden area first. Dab the fabric with diluted detergent rather than soaking the entire toy, then remove soap with a damp cloth. 20–40 minutes Low Avoid bleach, hot water, and aggressive rubbing because they may fade or mat the fabric.
Deep Washing Heavy dirt or an odor that cannot be removed by spot cleaning Mesh laundry bag, mild detergent, clean towels Use a gentle, cold-water wash only when the care label and construction allow it. Place the toy in a mesh bag and select a low-agitation cycle. 30–60 minutes, plus drying Medium Do not machine-wash toys containing electronics, fragile glued parts, paper components, or delicate antique fabrics.
Drying Wet or damp filling after cleaning Absorbent towels, ventilated drying area, fan Press the toy gently between towels, reshape it, and air-dry it in a well-ventilated place. Turn it regularly so the interior dries evenly. 24–72 hours Low Make sure the center is completely dry before storage to reduce the risk of mildew and musty odors.
Restoring Filling Flattened, lumpy, or uneven stuffing Polyester fiberfill, blunt stuffing tool, matching thread, needle Open a discreet seam, remove compacted or contaminated filling, add small amounts of fresh fiberfill, and distribute it gradually. 30–90 minutes Medium Do not overfill. Excessive stuffing can stretch seams, distort the shape, and make the toy uncomfortable to handle.
Replacing Filling Filling contaminated by moisture, pests, or persistent odor New polyester fiberfill, disposable gloves, thread, needle Carefully remove all old filling, inspect the interior, clean the washable shell, allow it to dry fully, and refill in layers. 1–3 hours Medium If mold is extensive or the material is fragile, professional conservation may be safer than home restoration.
Reshaping the Body Collapsed head, bent limbs, or an uneven body Fiberfill, clean towels, blunt tool, needle and thread Redistribute the filling from the center outward. Support the toy in its natural position while adjusting the stuffing and closing the seam. 30–90 minutes Medium Avoid forcing old fabric into a shape it can no longer support, especially when the fabric is thin or brittle.
Closing a Split Seam Small opening along a sewn seam Matching polyester or cotton thread, sharp hand-sewing needle, pins Tuck loose fibers inside, align the seam edges, and use a ladder stitch or small whipstitches. Tie the thread securely and hide the knot. 15–45 minutes Medium Use small, evenly spaced stitches and avoid pulling tightly enough to pucker or tear the fabric.
Repairing a Torn Fabric Panel Hole or tear away from the original seam Matching fabric, fabric scissors, needle, thread, optional fabric adhesive Trim only loose fibers, place a discreet patch behind the tear when needed, and stitch around the damaged area with even tension. 45–120 minutes High Choose a patch with a similar weight and stretch. Adhesive alone may become stiff and can fail during washing.
Smoothing Fur Flattened, tangled, or matted plush fibers Soft-bristle brush, wide-tooth comb, clean towel Work in small sections, brushing from the tips toward the base with gentle strokes. Remove tangles gradually instead of pulling them out. 15–60 minutes Low Stop if fibers shed heavily. Strong brushing can permanently remove pile from worn fabric.
Reviving Long Pile Long fur compressed after storage or washing Soft brush, low-speed hair dryer, clean towel Brush the fur while it is nearly dry. If necessary, use cool or low heat from a distance while continuously moving the dryer. 20–45 minutes Medium High heat can melt synthetic fibers, shrink fabric, or loosen glued components.
Removing Loose Threads Stray threads or snagged loops Small scissors, tweezers Snip loose threads close to the surface without cutting the surrounding fabric. Tuck stable thread ends into the seam. 5–15 minutes Low Never pull a long thread because it may unravel the surrounding seam.
Restoring Embroidered Eyes Loose, faded, or partially missing stitched eyes Embroidery floss, embroidery needle, fabric pencil Remove only unstable stitches, mark the original outline, and rebuild the eye with short satin or outline stitches. 20–60 minutes High Keep both eyes aligned in size, height, and spacing so the facial expression remains balanced.
Replacing Safety Eyes Missing, cracked, or loose plastic eyes Approved replacement safety eyes, washer backs, pliers Open the seam if necessary, remove the damaged part, install a compatible eye and backing, and close the seam securely. 30–90 minutes High For toys used by babies or toddlers, securely embroidered features are generally safer than detachable parts.
Repairing the Nose Loose, frayed, or missing nose Embroidery floss, felt or fabric scrap, needle, matching thread Re-stitch a small embroidered nose or sew on a properly shaped fabric piece. Anchor stitches through stable fabric rather than loose fur. 20–60 minutes Medium Avoid hard or sharp replacement pieces when the toy may be handled by young children.
Repairing the Mouth Faded, uneven, or unraveling mouth stitching Embroidery floss, embroidery needle, fabric pencil Photograph or trace the original expression, remove unstable thread, and recreate the line with short, controlled stitches. 20–60 minutes High Use the original stitch path as a guide to avoid changing the toy’s expression unintentionally.
Replacing an Ear or Limb Detached or severely damaged appendage Matching fabric, fiberfill, paper pattern, needle, strong thread Create a simple pattern from the remaining matching part, sew the replacement, lightly fill it, and attach it with reinforced stitches. 1–3 hours High Match the direction of the nap and the attachment angle before making permanent stitches.
Restoring Accessories Loose ribbons, clothing, buttons, or decorative pieces Matching thread, needle, replacement fabric, small scissors Remove unstable decorations, repair or replace them, and stitch them firmly to a clean, dry surface. 15–60 minutes Medium Inspect buttons and small accessories regularly because they can become choking hazards.
Final Quality Check Uneven shape, weak stitching, dampness, or loose parts after repair Bright light, clean hands, soft brush Check every seam, gently squeeze the toy for lumps, brush the fur, and confirm that all repaired parts are secure and dry. 10–20 minutes Low Do not return the toy to regular use until all thread ends, parts, moisture, and cleaning residues have been addressed.

Clean, Dry, and Test the Repaired Plush Toy Safely

Cleaning, drying, and testing are essential after repairing a damaged plush toy.

I usually begin by checking the fabric, seams, stuffing, and any attached parts. A small tear can hide loose filling or a damaged inner thread. That detail is easy to miss.

For washable fabric, I use lukewarm water, mild soap, and a soft cloth.

I avoid soaking toys with sound boxes, lights, or battery compartments. Instead, I wipe those areas carefully with a barely damp cloth. A soft toothbrush helps remove dust near stitched eyes and paws.

After cleaning, I press the toy gently between clean towels. I never twist it, because twisting can reopen fresh stitches.

Air-drying works best in a well-ventilated room, away from direct heat. The center may still feel damp when the surface seems dry. Patience matters here.

Once completely dry, I inspect every repaired seam by hand.

I lightly pull the fabric, but not aggressively. The stuffing should stay inside, and no needle, thread end, or small part should feel loose.

For toys containing electronics, I check that the compartment is closed securely before testing. I test sounds, lights, or movement for a short period and watch for unusual heat, smell, or noise.

Stop immediately if anything seems wrong.

My first repair was too tight, and the fabric puckered. I had to redo it. That mistake taught me to value flexibility over perfect-looking stitches.

FAQS

How should I inspect a damaged plush toy before repairing it?

Examine it under bright, natural light. Check seams, stuffing, stains, melted fibers, eyes, and loose threads. Small parts matter. Pause if the toy smells chemical, feels sticky, or shows heat damage.

What materials should I identify before sewing?

Check whether the outer fabric is cotton, polyester, velvet, faux fur, or knit. Each material needs different needle sizes and thread tension. Look through the opening before mixing fillings. Polyester fiberfill, foam, and natural fibers may behave differently.

How can I repair a small tear?

Trim loose threads with small scissors. Do not cut nearby stitches. Use matching thread and a sharp needle. A ladder stitch usually closes narrow tears neatly. Keep stitches small. Pull gently, or the fabric may pucker.

What is the safest way to repair a detached limb?

Place the limb in its original position and pin it carefully. Sew around the base several times with firm stitches. Do not crush the stuffing. Gently flex the joint afterward. Check for gaps and sharp thread ends.

How should I replace lumpy or missing stuffing?

Open a hidden seam carefully. Remove damaged filling with clean tweezers instead of forceful pulling. Add clean, washable polyester fiberfill in small handfuls. Pack the head and neck firmly, but fill limbs lightly. Overstuffing can create hard seams and a strange expression.

How can I restore dirty fur without damaging it?

Spot-clean the fur with mild detergent and a barely damp cloth. After drying, brush in the original direction. Avoid soaking older toys. Moisture can remain inside and cause odor or mold. This part is easy to underestimate.

How should I repair loose eyes, noses, or mouths?

Re-embroider loose facial features with secure stitching instead of relying on surface glue. Gently pull each attachment after repairing it, especially if young children use the toy. If a part remains loose, remove it rather than hiding the problem.

When should I stop repairing a plush toy?

Stop when the fabric feels sticky, fibers are melted, filling is contaminated, or structural damage is extensive. A visible flaw may be acceptable if the seam is secure and comfortable. I once tightened a seam too much. The face became crooked. A safe repair matters more than perfect appearance.

Conclusion

Learning how to fix damaged plush toys begins with carefully assessing the damage and identifying the toy’s materials, such as fabric, fur, stitching, filling, and plastic or embroidered features. Prepare a clean, well-lit workspace and gather suitable tools, including needles, thread, fabric scissors, gentle adhesive when appropriate, stuffing, and a soft brush. Small tears and loose seams should be repaired with neat, secure stitches, while detached limbs need careful alignment and reinforced sewing to restore strength.

After structural repairs, replace missing filling gradually and reshape the toy without making it too firm. Groom flattened fur, refresh facial details with safe fabric methods, and avoid harsh treatments that could cause further damage. Finally, clean the plush toy according to its materials, let it dry completely, and check every repaired area for loose threads, weak seams, or unsafe parts. This careful process helps make how to fix damaged plush toys a practical, gentle, and reliable task.

Amelia

Amelia

Amelia is a seasoned marketing professional with a wealth of expertise in our company’s core offerings. With an unwavering passion for driving growth and innovation, she plays a pivotal role in shaping our marketing strategies and enhancing brand visibility. A key aspect of her responsibilities......